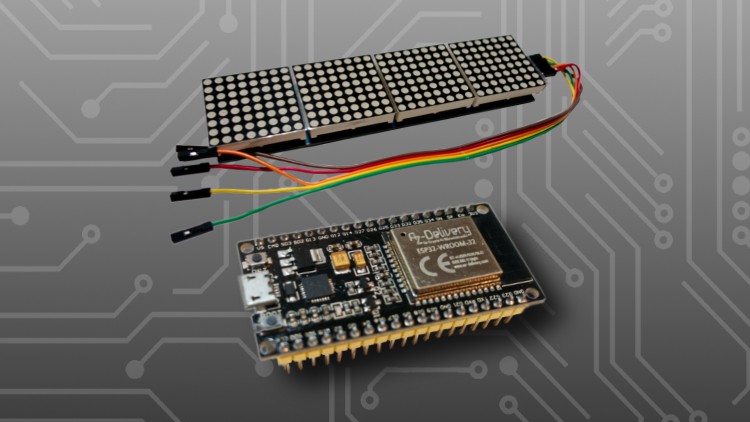
Via a local web server at the ESP we can change the ticker on the LED matrix (MAX7219 8×32)
What you will learn
Control of LED matrix via created web interface
Using HTTP request to load data from public APIs
Using JSON objects in Arduino
Displaying graphics and text on a display
Description
We build this practical project step by step and you can download all the codes for each chapter. Frustration-free development is guaranteed!
In this video course you will learn how to control a 8×32 LED matrix (or a MAX72xx module). We use the MD_Parola library for this project. With this library we can control the text in many different ways. With this library we have the possibility to implement different ticker settings easily and fast. A text can slide in from one side and stop in the middle of the matrix for a certain time. The duration of the ticker can be adjusted and also the speed and brightness of the ticker can be easily adjusted.
We will also insert dot graphics that will make the text “disappear” as soon as the graphic slides over the text.
We will create a website in the course using a local web server running on the ESP32/8266. The web server will be configured in such a way that you can access the created (also in this course) website using a fixed IP address. On the website there is an input field where you can enter text. Using jQuery we send a GET request to the Arduino, which evaluates the content and displays it on the LED matrix. This way you can individually control the text via the web server.
The text as well as the website data are stored on the ESP using SPIFFS. This is the flash memory of the Arduino. This means that the current text can be displayed on the website after each opening. By storing the data on the flash memory, every person/end device that calls up the website can see the current text on the LED matrix. Thus, one could also design a larger advertising space via a web server. If the Arduino were disconnected from power, the content of the output would not disappear and would automatically output the text again when the power source is connected again.
We will also display the local time. For this we connect to a NTP server and download the current timestamp. We convert this timestamp into a readable date/time.
Last but not least, we fetch the current bitcoin price from a public interface. Thus you learn how to control public APIs with the Arduino and how to evaluate the return value using Arduino JSON.
After each video I have saved my code. You can download all codes, so you can get to the result without frustration.
We use the following components in this project.
- ESP32/ESP8266
- MAX7219 8×32 LED-Matrix
- Step-down-Modul for external 12v power supply (optional)
See you in class.
pixelEDI
Content