• Post category:StudyBullet-7
  • Reading time:8 mins read


Learn to Develop drivers for GPIO,ADC,USART with help of CMSIS Core with minimum code.

What you will learn

stm32 essentials

STM32 ADC

STM32 USART

STM32 Interrupts

STM32 GPIO

SYSTICK Timer

Description

The biggest barrier while learning The STM32 series is the scariest boilerplate code generated by CubeMX or Standard Peripheral Library. Which often confuses new comers specially who are migrating from other 8 bit micro controller series like 8051 or Microchip PIC. If this is the barrier for you as well, then this course is a best starting point for the STM32 series.

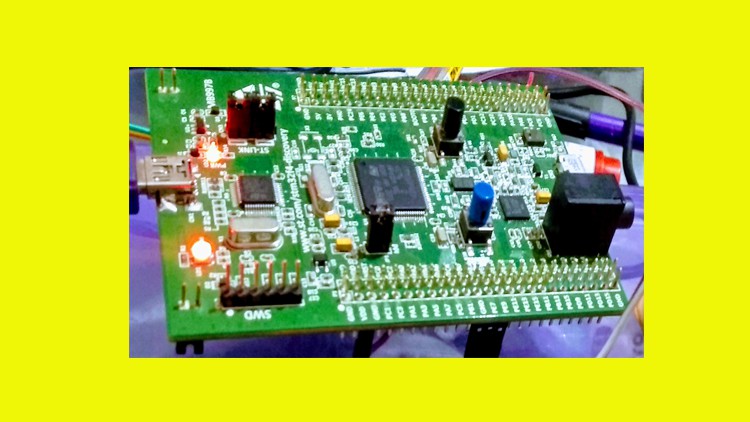
Although this course is designed and tested on STM32F4 Discovery board, but the learning curve is equally applicable to other STM32 families as well. While designing the course, I keep focused on those peripherals and applications which any embedded developer could face struggling who have previous 8-bit world or Non-ARM series background.

Even If you are coming from some other programming background but you have little knowledge of C language programming and you are confident using the hardware boards and have previous knowledge of any level about Embedded Systems and Electronics, you are good to start this course.


Get Instant Notification of New Courses on our Telegram channel.


DealsCrown Telegram Banner

The STM32 Families are very complex in nature with lot and lot of features and peripherals, I tried to cut out the complexity and focused on the day to day tasks which a normal embedded developer could face and try to teach those barriers. The main development is done on Keil UVision 5 which could be duplicated to any CMSIS supporting compiler. The reason for choosing the Keil for this course is because, Keil is very convenient for programming from the scratch or bare metal programming. The logic learned from this course could be applied to any STM32 Compiler and the code would work with other compilers as well. Also The skills of finding the desired peripherals and their registers from the reference manual and Datasheet will help you to adopt or use nay new peripheral if you ever need to extend your knowledge and experience.

You could directly use the registers in Attolic TrueStudio or STM32CUBEIDE as well. So even if you need to jump to Modern HAL Library style programming, Yet learning the register level will help you to build up your understanding of what’s going underneath and you will be able to fix things quickly if somethings goes wrong, or it will be more easy to adopt any new peripheral when required.

English
language

Content

Basics of the GPIO in the STM32F4 Devices

Creating Bare minimum Project in the Keil uvision 5
Including Device Specific Header file in main.c file
Reading Datasheet for GPIO Configurations as an OUTPUT
Introduction to Peripheral Clocks Specially GPIO Clock Bus
Introduction to GPIO Configuration Registers
GPIO MODER Register For Configuration as an Input or Output
Writing Code to Make GPIOD_12 as an OUTPUT
GPIO_OTYPER Register for Output as Push Pull or Open Drain
GPIO_ODR For Writing Logic to the Output Pin
Introduction to RCC Clock Controller and Enable GPIOD Clock
GPIO Registers Introduction

Blink the LED on Discovery Board

Configure ST-Link in Keil UVision 5
When Things doesn’t work as expected
New project with for loop delay to Blink LED

GPIO as an Input

Detect User Button Press as Active High State

Handling External Interrupts

Introduction to External Interrupts
SYSCFG Controller from Reference Manual
Enable the Clock for the System Configuration Controller
Writing Code for Handling External Interrupt

Cortex System Timer (SYSTICK)

Introduction to Cortex System Timer
Writing the code for creating Delays using SYSTICK Cortext System Timer

USART: Sending and Receiving Characters to and from USART

Introduction to USART Registers
USART_CR1 Register for Enable USART and its TX RX flags
USART->BRR Register for Generating Baudrate
USART->DR Register for Sending or Receiving Character
USART->SR Register for Reading the Status of USART
Writing the Code for Transmitting Character over USART
Code for USART_TX and RX without Interrupt

USART TX and RX using Interrupts

Write code for String Transmission with help of Interrupt
USART_RX With the help of Interrupts

Reading the Analog Inputs using ADC

STM32 ADC Overview
Understanding ADC Block Diagram
ADC On/Off Control Bit
Finding the ADC Channel Number for the GPIOC_Pin_0
Finding the Clock Source for the ADC in Reference Manual
Setting the GPIO as Analog Input
Set the ADC Channel Number in ADC_SQR3 Register
ADC Regular Sequence Control Register ADC_SQR1
Code for ADC Initialization in Single Channel Regular Conversion Mode
Code for ADC read function
Complete Code for ADC Reading and Debug Process
Understanding the ADC

Additional content Attolic True Studio using Standard Peripheral Library

Create a new project in Atollic True Studio
Generate Hex file from your Atollic True Studio project
Download Example project from TrueStore inot Atollic TrueStudio