• Post category:StudyBullet-8
  • Reading time:11 mins read


This 30 days challenge will teach you how to use ESP32 to its fullest potential.

What you will learn

1. You will get a good foundation in ESP32

2. You will be able to create projects easily

3. You can use ESP32 for your own projects

4. It is a great way to learn more about electronics

5. You will have fun learning ESP32

6. Be able to apply your knowledge in different projects

7. Get a deeper understanding of the hardware and software

Description

Introduction:

Are you looking for a single course to teach you everything about the ESP32? Look no further, this 30-day challenge course is for you. The course is designed for beginners who want to get started with the ESP32. We will start by configuring the wifi and network so that you can start coding and using the ESP32.

In the next 30 days, we will cover all the basic features of the ESP32 using a series of sample programs.

During these 30 days, you will develop your programming skills and learn how to use the various tools available for your work.

You will also learn how to connect to the ESP32 using the Arduino IDE and make use of libraries.

The ESP32 is a microcontroller with built-in Wi-Fi and Bluetooth capabilities. The ESP32 is a full-featured and powerful microcontroller that can be programmed using C/C++ or other languages.


Get Instant Notification of New Courses on our Telegram channel.


It has a lot of great features, including WiFi, Bluetooth, low power consumption, dual-mode Wi-Fi and Bluetooth connectivity. The ESP32 provides an integrated Wi-Fi and Bluetooth solution, which is the first fully integrated dual-mode Wi-Fi and Bluetooth SoC.

This course is on includes video content as well as text. The video content will include an overview of the ESP32, followed by an introduction to programming it. The videos also cover the following topics:
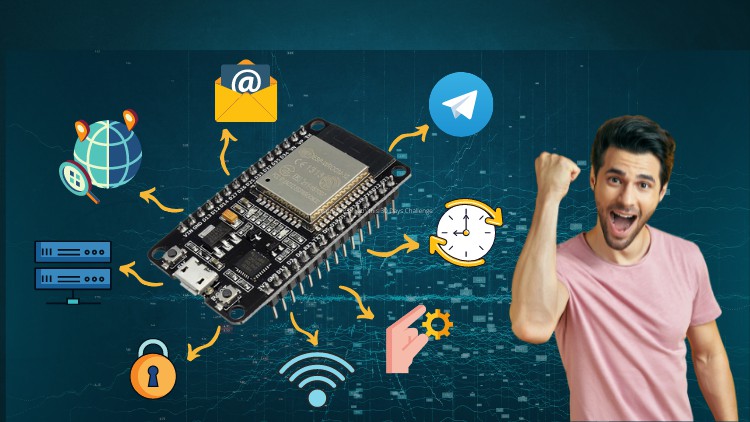
  • Day 1- 6:Β IoT Internet of Things Crash Course
  • Day 7 – 9: ESP32 Programming without Coding
  • Day 10 – 12: ESP32 OTA Update(Over the Air) course
  • Day 13 – 15: ESP32 Web Server
  • Day 16 – 18: ESP32 Email Alert Based on Sensors Reading
  • Day 19 – 21: Create IoT Smart Garden with ESP32 and Blynk
  • Day 22 – 24: ESP32 + Telegram: Get Real-time notification for FREE
  • Day 25 – 27: ESP32 + Databases to Control Anything Anywhere
  • Day 28 – 30: ESP32 + Arduino Interfacing: A Step by Step Course

The ESP32 turns the Arduino IDE into an efficient development platform for all kinds of embedded projects. With the growth of the IoT market, ESP32 is one of the best technologies to fight against competition with its features such as dual-core processor, Wi-Fi, and Bluetooth. The ESP32 is integrated with WIFI and Bluetooth which can be used to connect to the sensors and other devices.

Why you should take this course?

  • Learn ESP32 with this 30 Days Challenge course
  • Learn how to use different components of the ESP32
  • Get up to speed with the basics of programming and using the ESP32
  • Get access to a range of tutorials and resources to help you further your knowledge
  • You can use ESP32 for a wide range of applications, including home automation, IoT, and more.
  • Learning ESP32 will give you an edge over other programmers.

You will learn everything about ESP32 using this 30 days challenge.

Sign up for the challenge today!

English
language

Content

Day 1- 6:Β IoT Internet of Things Crash Course

who we are
Introduction
Hardware and Software Requirements
What is ESP32
ESP32 Features and Specifications
Important Note Review System
ESP Board Overview
ESP 32 Pinout v1 DOIT
Download and Install Arduino IDE
ESP8266 Download and Install Arduino ESP and USB Driver
ESP32 v1 Download and Install Arduino Development environment
USB Driver for ESP32
JSON Links to ESP32 Library for Arduino IDE

Day 7 – 9: ESP32 Programming without Coding

Load your first code
Blinking a LED
Hello World! Blinking a LED Code
Control Built In Touch Sensor with LED
The Touch Sensor Code
Dealing with Analog Signal
Analog Input
Dealing with PWM Control
PWM
Simple Servo Motor Control Code
Advance Servo control Using
Connecting to internet
Simple Wifi Server
Reading Temperature and Humidity
Sending and receiving Data from a Local Web Page

Day 10 – 12: ESP32 OTA Update(Over the Air) course

Introduction
What is OTA (Over The Air) technique
Libraries needed and how to install them
Coding your First OTA enabled ESP32 code example
The Code
Uploading OTA Enabled Code Example to ESP32 board
Upload New Code Over The Air Thing you must know

Day 13 – 15: ESP32 Web Server

Introduction
What is a web server
ESP32 Operating modes
Circuit Design
Understanding how esp32 works as a server
Coding WiFi and Webserver settings
Coding HTTP Requests and Server Start
Coding Client Methods
The Code
Writing HTML Code for Webpage
Practical

Day 16 – 18: ESP32 Email Alert Based on Sensors Reading

Introduction
Install ESP32 Mail Library for Arduino
What is SMTP Server
SMTP Server Settings
Coding the ESP32 Email Alert Project Part
Coding the ESP32 Email Alert Project Part2
Practical Testing
Sensor Alert via Email

Day 19 – 21: Create IoT Smart Garden with ESP32 and Blynk

Introduction
Hardware and Software Requirements
Working Principle
Circuit Connection
Coding ESP32 Part 1
Coding ESP32 Part 2
Coding Setup and Loop Part
Blynk App Download and Setup
mobile Blynk App Download and Setup
Auth Code and WiFi Settings

Day 22 – 24: ESP32 + Telegram: Get Real-time notification for FREE

Introduction
Hardware and Software Rewuirements
Creating Telegram Bot for Iot
Installing the Required Arduino Libraries
Circuit Schematic how to find the missing part
Write your Code Libraries and Variables
Write your Code SetUp
Write your Code Loop
Practical Testing
Practical Testing 2
Sending Temperature Sensor Reading to Telegram Bot

Day 25 – 27: ESP32 + Databases to Control Anything Anywhere

Introduction
PHP Part – Hosting Your Website
Creating SQL Table
The Code
PHP Script to Insert Data in Database
The Data Code
PHP Script to Display Reading
The Display Code
Coding ESP Part 1
Coding ESP Part 2
Practical Live Demonstration
Add Actual Sensors and display Reading on Webpage

Day 28 – 30: ESP32 + Arduino Interfacing: A Step by Step Course

Introduction
Hardware and Software Requirements
What is MQTT and why we need it
Create mqtt server account cloud mqtt
Create mqtt server account
Arduino Coding
The code
Esp Coding Part1 Define Variables
ESP Coding Part2 Wifi and MQTT
ESP Coding Part3 Read Incoming Data from Arduino
ESP32 The Code
Circuit Connection Explained
Connect Arduino Board and Make sure it works
ESP32 Code Update and Upload
Final ESP32 Server Test