Learn to create a professional interior 3D floor plan design presentation and learn how to draw in SketchUp
What you will learn
How you can draw a 3D floor plan in SketchUp
How to become an interior designer
How to furnish a room with 3D furniture
How to add colors and create materials in sketchup
How to present a design to your client
Description
How to create a professional 3D floor plan – Quickstart Sketch Up course
This course is especially designed for interior designers and home stylists. You don’t need any experience with SketchUp.
In this series I teach you step by step how to become a professional interior designer.
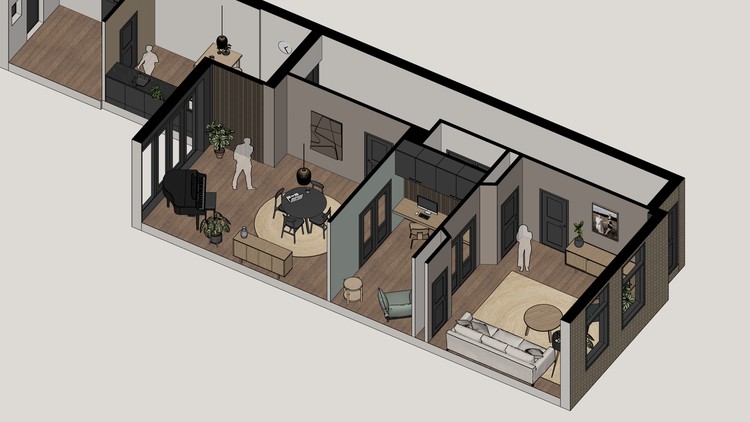
In this course I show you how to make a 3D floorplan in SketchUp.
A 3D floorplan is a great way to impress your clients, friends and family with your idea’s.
It tells you way more than a sketch or 2D floorplan. You can place furniture, styling objects and colors and textures. But at the same time you are making a realistic and makable design with the right dimensions.
When you’re not familiar with sketchup, this is a great place to start because I tell you everything you need to know to get started. I tried to be clear and focused on the right topics so you exactly learn what you need to learn.
SketchUp has many tools and functionalities. But in this course I only tell you the tools you need to know and understand so it becomes a tool you can use the rest of your life.
I use SketchUp in pretty much all my designs and made over a 1000 3D models so far.
SketchUp is a great tool because it works fast and intuitive. It’s like making a digital sketch but than realistic and precise.
I’ve received many questions from people who ask me how I can draw this fast and efficient.
In this course I’m gonna share a bunch of my secrets, tips & tricks about my workflow and way of working to create a professional 3D floorplan with the right look and feel.
I’m sure this course is gonna inspire you and help you to get started right away.
Every class comes with a class project. When you follow all the steps You end up with a professional 3D floor plan.
Lesson 1 – Setup SketchUp
- Create a free Sketch Up account
- Setup the right settings
- Save your project
Lesson 2 – Import & Scale
- Import a picture of a floor plan
- Practice using the shortcuts
- Scale your model to a 1 on 1 scale
Lesson 3 – Drawing outer walls
- Draw the outer walls
- Practice using the Line, Offset, Rectangle and Push/Pull tool
Lesson 4 – Drawing inner walls
- Draw the inner walls with cut-outs for windows and doors
- Practice using the Line, Rectangle, Push/Pull, Move and Scale tool
Lesson 5 – Doors & windows
- Draw the windows and doors
- Practice making groups and components
Lesson 6 – Tags & scenes
- Categorize the groups by using tags
- Create optimal viewpoints with scenes
Lesson 7 – Furnishing
- Download interior and styling items from the 3D warehouse
- Position the items and make a beautiful design
Lesson 8 – Colors, textures & materials
- Practice using the paint bucket and eyedropper tool
- Make your own textures by downloading or importing images
- Color all the walls, floors and furniture
- Harmonize your model by changing certain colors
Lesson 9 – 2D floorplans & sections
- Create dimensions and put them under a separate tag
- Make a 2D floorplan scene and choose a nice style
Lesson 10 – Presentation
Content